Fly Me to the Moon! (and the sun, planets, and a stray spacestation)

Brain Baby

I love cosmology and astrophysics. The idea that there is something out there that is more than life on Earth astounds me. Given the opportunity to base my project on any theme, I bounced on the opportunity to explore space.

I wanted to create something that is simple to navigate and would make people fall in love with cosmology as well. I thought the easiest thing for me to do so was to create an adventure type thing where people could fly a rocketship around to visit different “landmarks” in outer space. I initially wanted to have an Arduino x Processing project where essentially I would have a rocketship that is actually a magnet or something that would close the circuit and each planet/location in the solar system would be the switch, where when the rocket lands on it, the switch would close. When this happens, depending on which object the rocket lands on, a video/animation would play.

During our class discussing, Aaron brought up the idea of having a camera that tracks the location of the rocketship. He brought up something called TUIO, which of course I had no idea what it was but was immediately drawn to it because who doesn’t love cool technology right? I, therefore, decided I wanted to learn how this tracking thing worked and so abandoned my previous idea to do this new cool thing.

Resurging Regret

A few days later, I regretted my decision. When Aaron installed the projector and camera to the ceiling, I knew that I couldn’t back out anymore. (Abdullah took a video of my expression during the exact moment I realised how hard my life was going to be for the next two weeks, it was actually really funny but for my own appearances sake, I shall not post the video here.) Thankfully, Aaron worked with me for many hours to help me figure out how projection mapping worked, and how the PS3 Eye worked, how to calibrate the camera, and essentially explained to me every bit of the code that would allow me to proceed with the actual body of my project (i.e. the easy part). It took me a while of experimenting and looking at the code that Aaron had just explained to me for me to digest what exactly I needed to do to proceed with my project.

After teaching myself some code functions that I needed to successfully use OpenCV (sending my sketch to the projection), the rest of the project was easier. Knowing exactly what I wanted to do, the next part of my project was the easiest part. Utilising the coding knowledge that I already know, I completed the first “draft” of my project which I shared in my last blog post here.

(Please read that one before reading the next part of this reflection.)

Stressful Situations

Implementing the suggestions were hard. The part about the flashing Aaron fixed in a heartbeat but man, that first suggestion about being able to explore the planets really angered me. I couldn’t figure out why putting an if statement in my already existing if statement didn’t work, and why the while function basically made my whole sketch crash. NOTHING WAS MAKING SENSE! It was until I spoke to Aaron and he told me what was wrong and wrote the first part of the code for me and everything made sense again and nothing was wrong with the world. (Really though I still don’t understand how Aaron’s brain works and functions so fast and was able to solve my problem so quickly like honestly I was stuck on that part for at least a day, no joke. Ask someone who was in the lab then.) Implementing the switch mode/cases function that Aaron taught me, I was able to improve my project by allowing people to “explore” the planets/sun as much as they wanted and then going to the main page by moving the rocket to the exit at the right top corner. I also couldn’t figure out the playing of rocketship moving music when the rocketship was moving, but Aaron also helped me with this coding part and taught me the logic behind the code.

I also managed to print a rocketship as well, however, I didn’t use it during my first user-testing experience.

In the following class, I then got more feedback on how to improve. 1) Have another exit button so that it would be easier for people to navigate, 2) Have some text on top of the animations so that people could actually learn about the solar system like I originally wanted people to do. Kristopher jokingly said to get my facts from the first paragraph of each planets’ respective Wikipedia page; however, little did he know that it was exactly what I did. Thanks for the idea Kristopher!

I decided that instead of generating text directly onto the sketch, it would be easier to generate text boxes elsewhere and put them onto the animations as images. It took me a while to adjust the positions of the text boxes and the amount of text within each box so that the words would be legible but nothing was specifically hard about this process, it just took a lot of time.

The next step – which I thought was going to be the easiest step – actually took me a long time as well. I wanted to make the rocketship as mobile as possible and not situating it on top of the breadboard with the battery pack sitting just below the rocket. I wanted it to look professional and cool and ready to blast off any second. The original idea was to use coin batteries. But after multiple hours of soldering and experimenting with it, I realised that it didn’t have enough power to power the IR LED for long. Especially because the camera was even further away in the exhibition room, it was impossible to even track the light. Therefore, I had to resort back to using 4 double A batteries.

I don’t know how I even came up with the idea but I realised that the power strip part of the breadboard could be separated from the rest of the breadboard and it fit perfectly in the body of my rocket. I realised that I just needed to attach the LED on one end while having the battery pack plugged in the other end and that was all that was needed. After almost giving up on making my rocket look somewhat pretty, this idea worked! To not expose the batteries, I decided to cover it with a layer of aluminium foil and stick fire like images on all four sides of the battery so that it would like the rocket is blasting off.

With the completion of the rocket, I WAS DONE WITH MY PROJECT! HOORAY!

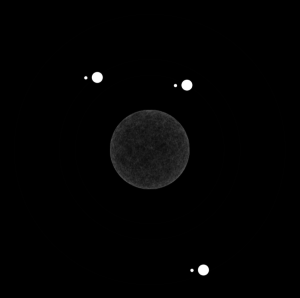
I forgot to mention that during the times I got stuck on my main project, I was coding this other makeshift computer generated solar system that has a sun in the middle with planets orbiting it. But wanting to make it unorthodox,  I had planets orbit the planets. The generated solar system was what would be seen when people land on the space station. An example of a generated solar system is seen here:

Showcase Shenanigans!

On the day of the showcase, I was geared and ready to go. I was excited that other people would be able to rekindle with their elementary school astronomy days and/or learn about our solar system.

The first 20 minutes of the showcase went by fast and really well. Everything was working, people were having fun. HOWEVER, 5 mins later while a person who looked pretty important was testing out my project, MY PROJECT STOPPED WORKING. A chill literally ran through me. My computer informed me that it had run out of RAM and before I could force quit my sketch and rerun it again, it literally froze. I had to resort to restarting my laptop, which was fine except for the fact that it takes around a billion years for my sketch to load. Approximately 7 minutes later, everything was back up and running again. Phew.

Anticipating that the same situation again, I made a mental note that in 20 mins, I would restart the sketch again so that my computer wouldn’t crash. I did so and everything was fine, except that 5 mins later after the sketch restarted again, SOMEONE PICKED UP MY ROCKET AND SHOOK THE WHOLE THING. The wires, unfortunately, came loose and so in front of everyone, I had to disect my rocket and reveal the anatomy of the poor thing. Man was I stressed. Fixing took a max 10 mins, but everything worked fine again. Everything was fine again until some little kid literally took my rocket apart and pulled the wires out but ya know, everything was cool. I tried to fix it but the clock stroke 8:30 and I abandoned my mission to fix my broken rocketship.

A compilation of people playing/learning with my project is here:

Despite my computer system crashing and the breaking of my rocketship, I think that the showcase went well. I got some super amazing feedback and some really interesting constructive criticism. Reflecting now, I learned a whole lot since 14 weeks ago when I literally knew NOTHING about coding. Though the past 14 weeks have been stressful, looking back, everything was really really worthwhile.

HERE’S A REALLY BIG THANK YOU TO THOSE WHO HAVE HELPED ME ALONG THE WAY AND BEEN PATIENT WITH ME, ESPECIALLY AARON, AND WHO HAVE TOLERATED ME THROUGHOUT THE PAST 14 WEEKS BECAUSE I PROBABLY HAVE ANNOYED EVERYONE WITH MY WEEKLY LOUD “WHY ISN’T THIS WORKING?!??!”‘S IN THE LAB. On top of learning some really cool and useful coding skills, I have met some really amazing people and have found a new interest that I hope I can pursue in the future. Surviving Intro to IM is probably the greatest highlight of this school year. 🙂

Here is the code for my final project:

Mainpage –

// import json file from mappingtackedspace 
import processing.sound.*;
import gab.opencv.*;
import org.opencv.imgproc.Imgproc;
import org.opencv.core.MatOfPoint2f;
import org.opencv.core.Point;
import org.opencv.core.Size;
import org.opencv.core.Mat;
import org.opencv.core.CvType;
import processing.video.*;
import com.thomasdiewald.ps3eye.PS3EyeP5;
import java.awt.Rectangle;
import codeanticode.syphon.*;
int posX, posY;


SoundFile rocketship;
PS3EyeP5 ps3eye;
Capture video;
OpenCV opencv;
JSONObject json;
PImage warped;
PImage irImage;
int videoWidth = 640;
int videoHeight = 480;
Mat transform;
ArrayList<PVector> vectors = new ArrayList<PVector>();
int blobSizeThreshold = 1;
SyphonServer server;

PGraphics canvas;

Movie sun, mercury, venus, earth, moon, mars, jupiter, saturn, uranus, neptune;
Movie generation1, generation2, generation3;

//String[] generation = {"generation1.mov", "generation2.mov", "generation3.mov"};

PFont title;
//PFont landing;

//String message1 = "Our Solar System";

PImage bg;
PImage ex, ex2;
PImage sun1, sun2, sun3, mercury1, mercury2, venus1, venus2, venus3, earth1, earth2, earth3, moon1, moon2, mars1, mars2, jupiter1, jupiter2, saturn1, saturn2, saturn3, uranus1, uranus2, neptune1, neptune2;

//int i=3;


void setup() {

  size(640, 480, P3D);
  //size(1440, 900, P3D);
  canvas = createGraphics(640, 480, P3D);

  bg = loadImage ("solarsystembackground2.jpg");
  ex = loadImage ("x.png");
  ex2 = loadImage("x2.png");
  sun1 = loadImage("sun1.png");
  sun2 = loadImage("sun2.png");
  sun3 = loadImage("sun3.png");
  mercury1 = loadImage("mercury1.png");
  mercury2 = loadImage("mercury2.png");
  venus1 = loadImage("venus1.png");
  venus2 = loadImage("venus2.png");
  venus3 = loadImage("venus3.png");
  earth1 = loadImage("earth1.png");
  earth2 = loadImage("earth2.png");
  earth3 = loadImage("earth3.png");
  moon1 = loadImage("moon1.png");
  moon2 = loadImage("moon2.png");
  mars1 = loadImage("mars1.png");
  mars2 = loadImage("mars2.png");
  jupiter1 = loadImage("jupiter1.png");
  jupiter2 = loadImage("jupiter2.png");
  saturn1 = loadImage("saturn1.png");
  saturn2 = loadImage("saturn2.png");
  saturn3 = loadImage("saturn3.png");
  uranus1 = loadImage("uranus1.png");
  uranus2 = loadImage("uranus2.png");
  neptune1 = loadImage("neptune1.png");
  neptune2 = loadImage("neptune2.png");


  posX=posY=0;
  warped = createImage(videoWidth, videoHeight, ARGB); 
  irImage = createImage(videoWidth, videoHeight, ARGB); 
  loadData();

  ps3eye = PS3EyeP5.getDevice(this);
  ps3eye.start();
  opencv = new OpenCV(this, irImage);


  //landing = createFont("Nasalization", 25);
  //textFont(landing, 25);

  //generations = new Movie[generations.length];
  //for (int i = 0; i < generation.length; i++) {
  //generation[i] = new Movie(this, generations[i]);
  //}

  rocketship = new SoundFile(this, "rocketship_mono.wav");
  rocketship.loop();
  rocketship.amp(0.0);

  sun = new Movie(this, "sun2.mp4");
  sun.loop();

  mercury = new Movie(this, "mercury2.mp4");
  mercury.loop();

  venus = new Movie(this, "venus2.mp4");
  venus.loop();

  earth = new Movie(this, "earth2.mp4");
  earth.loop();

  moon = new Movie(this, "moon2.mp4");
  moon.loop();

  mars = new Movie(this, "mars2.mp4");
  mars.loop();

  jupiter = new Movie(this, "jupiter2.mp4");
  jupiter.loop();

  saturn = new Movie(this, "saturn2.mp4");
  saturn.loop();

  uranus = new Movie(this, "uranus2.mp4");
  uranus.loop();

  neptune = new Movie(this, "neptune2.mp4");
  neptune.loop();

  generation1 = new Movie(this, "generation3.mov");
  generation1.loop();


  server = new SyphonServer(this, "Final Start");
}

void movieEvent (Movie m) {
  m.read();
}

void draw() {
  //background(0);
  //println(mouseX, mouseY);
  canvas.beginDraw();
  canvas.background (bg);
  title = createFont("Nasalization", 20);
  canvas.textFont(title, 20);
  canvas.textAlign(CENTER);
  canvas.text("Our Solar System", 480, 30);

  cv();
  fill(255, 0, 0);
  ellipse(posX, posY, 30, 30);

  canvas.endDraw();
  image(canvas, 0, 0);
  //image(warped,0,0);
  //server.sendImage(canvas);
  server.sendScreen();
}

Computer vision page –

int curX, curY = 0;
boolean isPlaying = false;
boolean available = true;
int mode = 0;
float volume = 0;
Movie gen;


void cv() {
  if (ps3eye.isAvailable()) {
    irImage = ps3eye.getFrame();
    opencv.loadImage(irImage);
    opencv.threshold(30);
    //changes the video feed to our mapped coords

    opencv.setGray(warpPerspective(vectors, videoWidth, videoHeight));
  }

  //image(irImage,0,0);
  //image(opencv.getOutput(), 0, 0);
  //image(warped,0,0);
  noFill();
  //stroke(255, 0, 0);
  //strokeWeight(3);
  noStroke();

  int prevX = curX;
  int prevY = curY;

  curX = posX;
  curY = posY;
  //print("These are my values : ");
  //println(curX, curY);
  //print("These were my values : ");
  //println(prevX, prevY);
  //println(mouseX, mouseY);


  for (Contour contour : opencv.findContours()) {

    Rectangle r = contour.getBoundingBox();

    //if (r.width > blobSizeThreshold || r.height > blobSizeThreshold) {
    //contour.draw();

    //stroke(255, 0, 0);
    //noFill();
    //strokeWeight(2);
    //rect(r.x, r.y, r.width, r.height);
    posX=(int)r.getCenterX();
    posY=(int)r.getCenterY();
    //ellipse((float)r.getCenterX(), (float)r.getCenterY(), 5, 5);


    if (((posX >0) && (posX<107)) && ((posY>0) && (posY<159)) && available) {
      mode = 1;
      available = false;
    }
    if (((posX > 128)  && (posX<153)) && ((posY >79) && (posY<108)) && available) {
      mode = 2;
      available = false;
    }
    if (((posX > 156) && (posX < 188)) && ((posY > 85) && (posY < 126)) && available) {
      mode = 3;
      available = false;
    }
    if (((posX > 193) && (posX<229)) && ((posY>99) && (posY<146)) && available) {
      mode = 4;
      available = false;
    }
    if (((posX > 230) && (posX<242)) && ((posY>80) && (posY<95)) && available) {
      mode = 5;
      available = false;
    }
    if (((posX > 234) && (posX<272)) && ((posY>124) && (posY<165)) && available) {
      mode = 6;
      available = false;
    }
    if (((posX > 274) && (posX<382)) && ((posY>121) && (posY<249)) && available) {
      mode = 7;
      available = false;
    }
    if (((posX > 327) && (posX<518)) && ((posY>223) && (posY<314)) && available) {
      mode = 8;
      available = false;
    }
    if (((posX > 467) && (posX<535)) && ((posY>306) && (posY<379)) && available) {
      mode = 9;
      available = false;
    }
    if (((posX > 558) && (posX<612)) && ((posY>359) && (posY<425)) && available) {
      mode = 10;
      available = false;
    }
    if (((posX > 72) && (posX<119)) && ((posY>399) && (posY<450)) && available) {
      //int i = int(random(generations.length));
      mode = 11;
      available = false;
    }
    if (((posX > 590) && (posX <width) && (posY < 30)&& (posY > 0)) || ((posX < 40) && (posX > 0) && (posY > 450) && (posY < height))) { 
      mode = 0;
      available = true;
    }
  }
  switch (mode) {
  case 0:
    canvas.background(bg);
    canvas.image(bg, 0, 0, width, height);
    canvas.textFont(title, 20);
    canvas.textAlign(CENTER);
    canvas.text("Our Solar System", 480, 30);
    break;
  case 1:
    canvas.image(sun, 0, 0, width, height);
    canvas.image(ex, 610, 13, 20, 20);
    canvas.image(ex2, 20, 447, 20, 20);
    canvas.image(sun1, 450, 60, 165, 120);
    canvas.image(sun2, 30, 250, 160, 120);
    canvas.image(sun3, 440, 350, 180, 120);
    canvas.textFont(title, 20);
    canvas.textAlign(CENTER);
    canvas.text("Sun", width/2, 30);
    break;
  case 2:
    canvas.image(mercury, 0, 0, width, height);
    canvas.image(ex, 610, 15, 20, 20);
    canvas.image(ex2, 20, 447, 20, 20);
    canvas.image(mercury1, 440, 60, 180, 120);
    canvas.image(mercury2, 20, 240, 160, 120);
    canvas.textFont(title, 20);
    canvas.textAlign(CENTER);
    canvas.text("Mercury", width/2, 30);
    break;
  case 3:
    canvas.image(venus, 0, 0, width, height);
    canvas.image(ex, 610, 15, 20, 20);
    canvas.image(ex2, 20, 447, 20, 20);
    canvas.image(venus1, 445, 60, 160, 120);
    canvas.image(venus2, 15, 280, 160, 120);
    canvas.image(venus3, 445, 350, 180, 120);
    canvas.textFont(title, 20);
    canvas.textAlign(CENTER);
    canvas.text("Venus", width/2, 30);
    break;
  case 4:
    canvas.image (earth, 0, 0, width, height);
    canvas.image(ex, 610, 15, 20, 20);
    canvas.image(ex2, 20, 447, 20, 20);
    canvas.image(earth1, 485, 60, 150, 120);
    canvas.image(earth2, 13, 260, 180, 120);
    canvas.image(earth3, 470, 350, 172, 120);
    canvas.textFont(title, 20);
    canvas.textAlign(CENTER);
    canvas.text("Earth", width/2, 30);
    break;
  case 5:
    canvas.image(moon, 0, 0, width, height);
    canvas.image(ex, 610, 15, 20, 20);
    canvas.image(ex2, 20, 447, 20, 20);
    canvas.image(moon1, 480, 55, 157, 120);
    canvas.image(moon2, 10, 260, 180, 120);
    canvas.textFont(title, 20);
    canvas.textAlign(CENTER);
    canvas.text("Moon", width/2, 30);
    break;
  case 6:
    canvas.image(mars, 0, 0, width, height);
    canvas.image(ex, 610, 15, 20, 20);
    canvas.image(ex2, 20, 447, 20, 20);
    canvas.image(mars1, 440, 60, 188, 120);
    canvas.image(mars2, 45, 260, 180, 120);
    canvas.textFont(title, 20);
    canvas.textAlign(CENTER);
    canvas.text("Mars", width/2, 30);
    break;
  case 7:
    canvas.image(jupiter, 0, 0, width, height);
    canvas.image(ex, 610, 15, 20, 20);
    canvas.image(ex2, 20, 447, 20, 20);
    canvas.image(jupiter1, 465, 60, 170, 120);
    canvas.image(jupiter2, 25, 260, 180, 120);
    canvas.textFont(title, 20);
    canvas.textAlign(CENTER);
    canvas.text("Jupiter", width/2, 30);
    break;
  case 8:
    canvas.image(saturn, 0, 0, width, height);
    canvas.image(ex, 610, 15, 20, 20);
    canvas.image(ex2, 20, 447, 20, 20);
    canvas.image(saturn1, 425, 50, 210, 130);
    canvas.image(saturn3, 55, 310, 180, 110);
    canvas.image(saturn2, 405, 345, 225, 100);
    canvas.textFont(title, 20);
    canvas.textAlign(CENTER);
    canvas.text("Saturn", width/2, 30);
    break;
  case 9:
    canvas.image(uranus, 0, 0, width, height);
    canvas.image(ex, 610, 15, 20, 20);
    canvas.image(ex2, 20, 447, 20, 20);
    canvas.image(uranus1, 455, 60, 180, 100);
    canvas.image(uranus2, 5, 320, 200, 120);
    canvas.textFont(title, 20);
    canvas.textAlign(CENTER);
    canvas.text("Uranus", width/2, 30);
    break;
  case 10:
    canvas.image(neptune, 0, 0, width, height);
    canvas.image(ex, 610, 15, 20, 20);
    canvas.image(ex2, 20, 447, 20, 20);
    canvas.image(neptune1, 465, 50, 170, 140);
    canvas.image(neptune2, 40, 350, 200, 120);
    canvas.textFont(title, 20);
    canvas.textAlign(CENTER);
    canvas.text("Neptune", width/2, 30);
    break;
  case 11:
    canvas.image(generation1, 0, 0, width, height);
    canvas.image(ex, 610, 15, 20, 20);
    canvas.image(ex2, 20, 447, 20, 20);
    canvas.textFont(title, 20);
    canvas.textAlign(CENTER);
    canvas.text("Generated Solar System", width/2, 30);
    break;
  }
  if ((curX != prevX) && (curY != prevY) && (!isPlaying)) {
    volume+=.1;
  } else volume-=.1;
  volume = constrain(volume, 0., 1.);
  println(volume);
  rocketship.amp(volume);
}

IR tracking page –

Mat getPerspectiveTransformation(ArrayList<PVector> inputPoints, int w, int h) {
  Point[] canonicalPoints = new Point[4];
  canonicalPoints[0] = new Point(w, 0);
  canonicalPoints[1] = new Point(0, 0);
  canonicalPoints[2] = new Point(0, h);
  canonicalPoints[3] = new Point(w, h);

  MatOfPoint2f canonicalMarker = new MatOfPoint2f();
  canonicalMarker.fromArray(canonicalPoints);

  Point[] points = new Point[4];
  for (int i = 0; i < 4; i++) {
    points[i] = new Point(inputPoints.get(i).x, inputPoints.get(i).y);
  }
  MatOfPoint2f marker = new MatOfPoint2f(points);
  return Imgproc.getPerspectiveTransform(marker, canonicalMarker);
}

Mat warpPerspective(ArrayList<PVector> inputPoints, int w, int h) {
  Mat transform = getPerspectiveTransformation(inputPoints, w, h);
  Mat unWarpedMarker = new Mat(w, h, CvType.CV_8UC1);    
  Imgproc.warpPerspective(opencv.getGray(), unWarpedMarker, transform, new Size(w, h));
  return unWarpedMarker;
}

void loadData() {
  json = loadJSONObject("coords.json");
  JSONArray coordsData = json.getJSONArray("coords");
  for (int i = 0; i < coordsData.size(); i++) {
    // Get each object in the array
    JSONObject coord = coordsData.getJSONObject(i); 
    // Get a position object
    JSONObject position = coord.getJSONObject("position");
    // Get x,y from position
    int x = position.getInt("x");
    int y = position.getInt("y");
    vectors.add(new PVector(x, y, 0.0));
  }
}


And here is the code to make the computer generated solar system:

Mainpage –

import peasy.*;
Planet sun;

PeasyCam cam;

PImage bg;
//PImage starfield;

PImage sunTexture;
PImage[] textures = new PImage[9];

void setup() {
  //size(600, 600, P3D);
  //size (1280, 720, P3D); //starfield 2
  size (1280, 720, P3D); //starfield 1
  //fullScreen(P3D);
  
  bg = loadImage("starfield1.jpg");
  //starfield = loadImage("starfield1.jpg");

  
  sunTexture = loadImage("sun.jpg");
  textures[0] = loadImage("earth.jpg");
  textures[1] = loadImage("jupiter.jpg");
  textures[2] = loadImage("saturn.jpg");
  textures[3] = loadImage("mercury.jpg");
  textures[4] = loadImage("venus.jpg");
  textures[5] = loadImage("mars.jpg");
  textures[6] = loadImage("uranus.jpg");
  textures[7] = loadImage("neptune.jpg");
  textures[8] = loadImage("moon.jpg");
  
  cam = new PeasyCam(this, 500);
  sun = new Planet(50, 0, 0, sunTexture);
  sun.spawnMoons(5, 1);
}

void draw() {
  background(bg);
  //background(0);
  
  
  ambientLight(255,255,255);
  pointLight(255, 255, 255, 0, 0, 0);
  sun.show();
  sun.orbit();
  //image(starfield, 0, 0, width, height);


}

void keyPressed(){
  if(key==CODED&&keyCode==DOWN){
    setup();
  }
}

Planets class page –

class Planet {
  float radius;
  float distance;
  Planet[] planets;
  float angle;
  float orbitspeed;
  PVector v;

  PShape globe;

  Planet(float r, float d, float o, PImage img) {

    v = PVector.random3D();

    radius = r;
    distance = d;
    v.mult(distance);
    angle = random(TWO_PI);
    orbitspeed = o;

    noStroke();
    noFill();
    globe = createShape(SPHERE, radius);
    globe.setTexture(img);
  }

  void orbit() {
    angle = angle + orbitspeed;
    if (planets != null) {
      for (int i = 0; i < planets.length; i++) {
        planets[i].orbit();
      }
    }
  }

  void spawnMoons(int total, int level) {
    planets = new Planet[total];
    for (int i = 0; i < planets.length; i++) {
      float r = radius/(level*2.5);
      float d = random((radius*2), (radius+(r*1.5))*2.75);
      float o = random(-0.05, 0.05);
      int index = int(random(0,textures.length));
      planets[i] = new Planet(r, d, o, textures[index]);
      if (level < 2) {
        int num = int(random(0,3));
        planets[i].spawnMoons(num, level+1);
      }
    }
  }

  void show() {
    pushMatrix();
    noStroke();
    PVector v2 = new PVector(1, 0, 1);
    PVector p = v.cross(v2);
    rotate(angle, p.x, p.y, p.z);
    stroke(255);
    //line(0, 0, 0, v.x, v.y, v.z);
    //line(0, 0, 0, p.x, p.y, p.z);
    translate(v.x, v.y, v.z);
    noStroke();
    fill(255);
    shape(globe);
    //sphere(radius);
    //ellipse(0, 0, radius*2, radius*2);
    if (planets != null) {
      for (int i = 0; i < planets.length; i++) {
        planets[i].show();
      }
    }
    popMatrix();
  }
}

Here’s to the 567 lines of code that worked to create my final project!

To improve my project:

  • Move the spacestation further away from the “x” at the bottom left corner so that people don’t accidentally go over it.
  • Rather than have video animations, have images that would just loop to look like animations, perhaps this would take up less RAM and wouldn’t lead to my computer crashing.
  • Glue the rocketship to the battery so people won’t be able to pull it apart and somehow stick the wires so that it wouldn’t loosen and pop out.

IM Final Project – User Testing

So after finally getting my project to work (thank you so much Aaron for your help!!), I had my project tested by 3 different people and it was interesting to see what they had to say about my project.

Here is how the interactions typically went:

User: Woah!

Me: Would you want to user test my project?

User: Sure!

(looks at the projection)

What do I do?

Me: Pretend like my Arduino is a rocketship and visit the planets.

User: Ah! I see. (moves pretend rocketship around)

User 1:

User 2:

User 3:

The user testing experience was pretty positive actually and some of the suggestions from them are:

  1. If the rocket ship were to visit the planet, it would make sense that when the projection pops up once the rocket lands on the planet, that the rocket ship would be able to go around the planet animation to essentially “explore” it. Rather than having the boundaries be limited to the area in which the rocket lands, allowing it to explore the planet would be cool. – I really think that this is something I want to try out, especially if the goal was to “explore” the planets. However, I guess if it were to be like “land here to see an animation of the thing you landed at”, it would be okay.
  2. What is with the flashing?!!? – Definitely, need to address this because it’s actually quite annoying.

One thing I definitely need to work on is how I can get the users to start the interaction themselves without my spoken prompt, I don’t know if I should have it displayed on the screen or have an instruction panel next to my project since it is going to be projected onto a surface. I need to work out how this works.

I think that it would also be great if some space-style music played in the background as well. I’ll see if that actually works out. Another note, I need to also incorporate my other small side project of “creating your own solar system” into this project.

Computer Vision for Artists and Designers: Pedagogic Tools and Techniques for Novice Programmers – Response

For me, this reading was actually really interesting and enjoyable to read; not only because it’s relevant to my IM final project, but also because it was interesting to understand the different types of manipulating computer vision algorithms and understanding the different situations in which each type is used.

One idea that struck out to me the most is the idea that “computer vision algorithms can be selected to best negotiate the physical conditions presented by the world, and likewise, physical conditions can be modified to be more easily legible to vision algorithms”. This idea refers to the bidirectional process in which computer vision works – the environment of the “project” and the algorithm itself need to complement each other. In terms of how this idea would apply to my project, it would mean that in addition to having code that looks like it would work, I would have to create a physical condition which would allow the code to work. Especially because the project is interactive, it has to be highly sensitive to changes caused by user action and the only way to do this would be to create an environment that allows the code to run smoothly.

Final Project Idea

For my IM final project, I want to make a solar system learning system that allows the user to move a rocket ship around on a table to different planets/stars/moons in our solar system in which animations/videos will play that allows you to learn about the “station” that the rocket ship is currently at. The purpose of this project is education and could be used as a method of teaching or simply as an installation at astronomy museums.

Materials I would need:

  • table: obvious reasons
  • projector: so that I can project the image onto the table
  • camera: to track the rocket ship figure around the table

Next steps:

  • understand how TUIO works and/or understand how to track an object using a camera
  • find an image of the solar system that could be projected onto the table
  • find videos/animations that would play at each station
  • make a rocket ship figurine, potentially make the stations as well (making it so that it’s more than just a projection)

What does computing mean to me?

In terms of coming up with a definition of what computing means, I cannot yet give an answer for that I am still not sure the scope of computing. My previous understanding of computing has definitely expanded, however. There is a lot more to computing than I had originally thought, different languages, different programmes, different approaches to achieve different outcomes, or perhaps similar ones.

In contrast to my limited knowledge of the actual definition of computing, I do know my own definition of computing. It’s the long and arduous process that consists of me basically not knowing why certain lines of code work and why they do what they do, researching about them, learning about them, and then replicating them in my own projects. It’s a stressful task, but rewarding at the same time. I have realised that a lot of times, I need to go through each step slowly, thinking logically before diving head-first into the freezing cold water. In this case, the projects being the water. Perhaps I need to put on a cold-suit first, but before putting it on I need to find one. With this cold-suit, I am able to bear the task of swimming in the cold. The cold-suit is like the knowledge that I currently have and further need; perhaps sometimes I need additional research and help, some logical thinking and planning before I can approach the task at hand.

The process of learning how to compute, and thus being in this intro class, introduced me to a lot of pretty awesome people whom I have lots of pretty good banter (in my opinion). Computing has given me a really enjoyable (though stressful!) time so far.

DIY Non-Destructive Earthquake!

(Although I think this project may seem easy to some of you, for a coding noob like me who had no experience of coding before this class, I’m pretty proud of what I have done!)

I decided that for this week’s project, I wanted to work on my Earthquake text from last class – hoping that I could also incorporate Aaron’s suggestion of getting the background to move as well.

I started off with getting Processing to talk to Arduino first because I thought that in terms of the coding, it was easier for me to understand. I decided that I wanted to have some sort of “alarming” factor that happens when the Earthquake happens and what better way to catch someone’s attention by using blinking LEDs, right?

I wanted to write some piece of code that when the earthquake shakes, there would be an initial delay in the LED blinking to replicate the real-life situation (according to my geography studies, earthquakes are unpredictable and cannot be predicted until a few seconds before the earthquake and therefore when the earthquake actually happens, the alarms are already late). The blinking code was fairly easy, codes that we learned in the first week or two of class. I made it compatible with Processing, that when I pressed on the mouse, the letters would shake and the LED would blink rapidly. However, what I realised is that even though I did not have a delay at the beginning of the code that declared a delay in the blinking, the code did exactly what I wanted it to do. Cool, yay! I got something to work!

So came the hard part, and it all went downhill from there. My joy went from 100 to 0 real quick. It was time for me to get Arduino to talk to Processing. This process for me kind of felt like talking to a cat, sometimes it would respond but most of the times it wouldn’t care about you at all. Processing was the cat in this case. My next line of action was to connect an accelerometer to my Arduino and make it so that when somebody shakes my board, the letters on the screen shakes with the motion. To get to this goal, I needed to learn first how an accelerometer worked first (I got inspired to use this through Romeno’s project from a while back). I knew that from the accelerometer, I would get 3 different values for each reading, 1 for the x-axis, 1 for the y-axis, and 1 for the y-axis. I thought that it would be easier to take just one value for each reading, and stuck with just receiving the values in the x-axis only.

I got the accelerometer to work, found out the x-value in the initial position, but I didn’t know how to proceed. I knew I needed to write a piece of code in Arduino that would pick-up a large movement in the accelerometer. Aaron suggested that I could add the three axes together and keep a running count of the sum. Then if the difference between the current sum and a previous sum maybe 10 frames ago is greater than a certain threshold then that could be considered as a trigger. I thought that using the sum of the 3 axes was a good idea: first, there would be a larger difference in the sum every movement as it takes into account changes in all axes, and second, it would be easier to manipulate and use in terms of my code as it takes into account all types of movement of the accelerometer rather than simply the x-values that I was using before.

Okay, I got the sum. From there, I was once again stuck on how to proceed and use this sum. I decided to take a break from my code and actually draw out a flow chart of what my goal is and how I needed to get there through coding. I realised after a while that in order for me to get the letters to move through the movement in the accelerometer, I had to have some input that shows the change between the current sum of the axes and the initial sum. From the serial monitor in Arduino, I found that the initial sum was around 1074. The difference between the new sum and the initial sum would thus be something like difference = new sum – 1074. I realised I had to make this a variable and insert an if () function that would shake the letters if the difference is greater than a certain number. Inputting a random number and uploading both the code from Arduino and Processing, (here’s where everything was nice again) I REALISED THAT MY CODE WORKED! When I shook my board, the letters vibrated as well.

I wanted to implement the suggestion that Aaron gave me last week – to get the background image to vibrate as well. With help from a friend, I realised that a background wouldn’t be able to vibrate and rather I had to get the soil background to be an image that would look like a background but isn’t actually a background but only an image instead. I had to also make sure that the screen size and the image were different sizes, the image had to be bigger so that when the image shook, there wouldn’t be some vibration that would reveal the coloured background in the back. My friend suggested that I made the image shake using a boolean, meaning that it would either shake or not shake depending on the situation. I had to play around with the “translation” aspect of the image, changing numbers to make sure that when it did shake, there would be vibrations across the whole screen and not only at certain parts. The image vibration and shake that I ended up with has a random movement, like the letters.

Voilà. I did it. I actually finished my project.

To sum up what my project does:

  1. If you shake the board which has the accelerometer attached to it, the letters would shake and move around arbitrarily,
  2. While the letters are moving around arbitrarily, the background is also moving in a vibrating, earthquake-movement, random fashion,
  3. After a short delay of a second-ish after the earthquake has started, the LED would start blinking quickly and would stop blinking a second-ish after the earthquake has ended (replicating the real-life situation of alarms during earthquakes).
  4. (The space bar still brings everything back to the home position).

Here is a video of how it works:

Here is a screen-capture of both the letters and the background moving:

Here is the Arduino code:

void setup()
{
  Serial.begin(9600);      
  Serial.write(0);
  pinMode(2,OUTPUT);
}

void loop()
{
   int sensorX = analogRead(0);       
   int sensorY = analogRead(1);       
   int sensorZ = analogRead(2);       
 
    float sum = sensorX+sensorY+sensorZ;
    Serial.println (sum);
    delay(10);             
    
    if(Serial.available()>0){
    int inByte=Serial.read();
    
    if (inByte == 1){
      digitalWrite(2, HIGH);   
      delay(10);               
      digitalWrite(2, LOW);    
      delay(10); 

    if (inByte == 0){
      digitalWrite(2, LOW);
    }
}
    }
    int sensor = analogRead(A0);
    delay(0);
    sensor/=4;
    Serial.write(sensor);
  }

Here is the Processing code:

Main page:

import processing.serial.*;
Serial myPort;

import geomerative.*;
RFont font;
//PImage bg;
PImage img;
String message = "EARTHQUAKE";
int i;
String val;

Letter[] letters;

boolean imageShake = false;

int xPos=0;

void setup() {
  //size(900, 600);
  size (800, 500);
  //bg = loadImage ("soil.jpg");
  img = loadImage ("soil.jpg");
  background(255);
  textSize (70);

  RG.init(this);
  font = new RFont("Courier New Bold.ttf", 1000);

  letters = new Letter[message.length()];
  int x = 200;
  for (int i = 0; i < message.length(); i++) {
    letters[i] = new Letter(x, 280, message.charAt(i));
    x += textWidth(message.charAt(i));
  }

  printArray(Serial.list());
  String portname=Serial.list()[4];
  println(portname);
  myPort = new Serial(this, portname, 9600);
  myPort.clear();
  myPort.bufferUntil('\n');
}


void draw() {
  //background(bg);

  if (imageShake == true) {
    image(img, -50 + random(-25, 25) , -50 + random(-25, 25));
  } else {
    image(img, -50, -50);
  }
  for (int i = 0; i < letters.length; i++) {
    letters[i].display();     // Display all letters
  }
}

float diff;

void serialEvent(Serial myPort) {
   xPos=myPort.read();
   myPort.write(0);
  
  String s = myPort.readStringUntil('\n');
  s=trim(s);

  if (s!=null) {
    //int values[]=int(split(s,'\n'));
    float value = float(s);
    diff = abs(value - 1074.0);
    if (diff>25) {
      for (int i = 0; i<letters.length; i++) {
        letters[i].shake();
        imageShake = true;
        myPort.write(1);
      }
    } else {
      for (int i = 0; i<letters.length; i++) {
        letters[i].secondPosition();
        imageShake = false;
        myPort.write(0);
      }
    }
    if (keyPressed) {
      for (int i = 0; i<letters.length; i++) {
        letters[i].home();
      }
    }
  }
}

Class page (same as last week):

class Letter {
  char letter;
  float homex, homey;
  float x, y;

  Letter (float _x, float _y, char _letter) {
    homex = x = _x;
    homey = y =_y;
    letter = _letter;
  }

  void display() {
    fill(255);
    textAlign(CENTER);
    text(letter, x, y);
  }

  void shake() {
    x += random(-8, 8);
    y += random(-8, 8);
  }

  void secondPosition() {
    lerp(x, homex, 0.07);
    lerp(y, homey, 0.07);
  }
  
  void home() {
    x = lerp(x, homex, 0.01);
    y = lerp(y, homey, 0.01);
  }
}

This project took me a very very long time. I would like to thank my friend, Navya, for explaining concepts to me and for helping me understand what the logic behind my project and helping me envision what my code needs to look like and ultimately helping me reach the end goal (aka this project). I think that I learned a lot about programming from this assignment, though it did stress me out a lot. Overall, I am happy with what the project turned out to be!

Generative Text Design

For this week’s assignment, I decided to make a generative text design rather than making a data visualisation – don’t really know why, I just thought it would be cooler.

In class, when we were going through examples, I wanted to do do something so that each letter of the word would be its own object, meaning that I could manipulate each letter and not have it so that it is bound by the whole word. I started by making each letter go under a class. I used Aaron’s example of inputting texts and the text formatting, though I changed the text font into another monospaced font.

Using a Processing example on processing.org, I was able to manipulate pieces of code so that I got my letters to vibrate, move and shake in a fashion that, to me, resembled what it would be like in an earthquake. I, therefore, decided to change the word to “Earthquake”, instead of the original “Ivory” that I had inputted. The soil background was just for more of an “earthy” effect – not much reason to it.

Originally, I programmed it so that when the mouse was pressed, the letters would move in arbitrary directions (like an earthquake where things go everywhere) and then when released, would move back to the home position. However, I felt like this quick and instant movement into the home position did not resemble a real earthquake and so I attempted to write some code so that the movement towards the home position would be slower and more subtle. I tried to mimic Aaron’s use of speed and acceleration in his project that he showed us, but didn’t get that to work no matter how much I tried. I then resorted to google to find out what other functions I could use.

After experimenting with many different types of functions, I resorted to asking a friend for help. He suggested I used some maths, where I would write a function that would get the difference between the x position and the home x position (and the difference between the y position and the home y position) and divide that by a certain number and then equate that to x, so that there would be a movement back towards the initial home position that is slower. I tried to implement what he suggested, but I couldn’t get it to work.

After thinking about what other functions I could try and use, my friend asked me if I had used the lerp () function before. I said that I have, but only when drawing lines and not for moving objects around. He said that the concept is the same and would probably work in the case of my project. I, therefore, started playing around with the lerp function in the hopes that I could finally get the letters to do what I wanted it to do.

Before I explain the next process that I took, I feel that it’s important for me to include my code so that I could refer to it whilst describing.

Here is the main setup tab:

import geomerative.*;
RFont font;
PImage bg;
String message = "EARTHQUAKE";

Letter[] letters;
 
void setup() {
  size(900, 600);
  bg = loadImage ("soil.jpg");
  background(255);
  textSize (70);

  
  RG.init(this);
  font = new RFont("Courier New Bold.ttf", 1000);
  
  letters = new Letter[message.length()];
  int x = 250;
  for (int i = 0; i < message.length(); i++) {
    letters[i] = new Letter(x,310,message.charAt(i));
    x += textWidth(message.charAt(i));
  }
}
 
void draw() {
  background(bg);
  for (int i = 0; i < letters.length; i++) {
    letters[i].display();     // Display all letters
     
    if (mousePressed) {
      letters[i].shake();
    } else {
      letters[i].secondPosition();
    }
    if (keyPressed) {
    letters[i].home();
  }
  }
  
}

Here is the letters class tab:

class Letter {
  char letter;
  float homex, homey;
  float x, y;

  Letter (float _x, float _y, char _letter) {
    homex = x = _x;
    homey = y =_y;
    letter = _letter;
  }

  void display() {
    fill(255);
    textAlign(CENTER);
    text(letter, x, y);
  }

  void shake() {
    x += random(-8, 8);
    y += random(-8, 8);
  }

  void secondPosition() {
    lerp(x, homex, 0.07);
    lerp(y, homey, 0.07);
  }
  
  void home() {
    x = lerp(x, homex, 0.02);
    y = lerp(y, homey, 0.02);
  }
}

The first lerp functions that I got to work were the ones seen in under the void secondPosition () function, where I did not equate x and y to the lerp functions. This meant that rather than moving back to the home positions, when I clicked the mouse and the letters started moving haphazardly around and I released the mouse, the letters would stay in the place where I released the mouse. I thought that this was pretty cool and represented the reality of the earthquake well – if we were to imagine the letters being actual objects (like furniture for example), after an earthquake happens, the furniture would not move back by itself and would require some sort of other movement to move it back (humans moving it) or to move it around even more (aftershocks of the earthquakes, perhaps). I wanted to keep the code, but it wasn’t what I originally wanted to do, I still wanted a function that would move my letters back to the original position.

I realised that I needed more than a mousePressed () function if I wanted to to do two different things with the lerp () function. At this point, after experimenting with the lerp () function even more, I realised that equating x and y to the lerp functions would move the letters back. I wanted to keep the two ideas of 1) allowing for aftershocks to happen (continued shaking away from initial position) and 2) allowing for “clean-up” to happen (smoother movement towards initial letter position). I decided to allocate movement 1 to mouse press and movement 2 to key press.

This produced the effect shown in the video below:

If I were to improve this project, I would change and play around with the colour of the text. I played around with the lerpColor () function but couldn’t get it to work.

DISCLAIMER: Maybe I should have put this at the top…sorry that there’s a lot of words in this post but I’m pretty proud of the process that I took to finish this project and was able to use code that I actually understand and found to not be complicated and I was able to debug my own code when it didn’t work and I’m just very thankful for friends (shoutout to Navya and Abdullah) who directed me in the way that allowed me to discover things myself and help me realise that I could do something cool! I shall end the blog post now.

Digitise Everything – Response

Reading about the digitisation of “everything” reminded me a lot of another class I’m in that I keep on referencing in my responses to readings, ‘Future of Medicine’. Within that class we talk about how medicine is evolving in a way that requires data and information to become digitalised and therefore, more widely accessible. In this reading, this idea becomes clear on page 86, where the author notes that digitisation increases levels of understanding. Something that I have not really thought about, however, is the idea shown on page 88 that digitalisation can help us better understand the past. Although digitalisation may potentially decrease the value of some aspects of the past (e.g. the value of the knowledge on some piece of information), what digitalisation can also do is not only understand the past but also preserve bits of the past. I think that in this age, preservation and conservation are two very important actions that we should take – digitalisation of everything aids us in this process.

Universe Art Project – Using Object-Orientated Processing

Last week, I went to an Institute talk regarding recent discoveries in the universe that has been found using a new type of telescope that is able to act like a satellite.

One of the coolest ideas that I found in that talk was the idea that there are certain “moon” like structures that have a gravitational pull that allows “planets” and asteroids to orbit it. However, because of the different mass of the asteroids/planets, there exist different orbit distances and speeds that they travel at. On top of this, sometimes, there even exists orbits around the asteroids/planets that are orbiting the bigger moon – much like Earth’s moon.

I wanted to replicate this idea and so instead of a game, I wanted to create a moving art piece that basically shows what the speaker was talking about.

The code can be seen below:

Moon moon, moon2;
Orbits orbits, orbits1, orbits3;

void setup() {
size(600, 600);
smooth(8);
background(0);
moon = new Moon(80);
orbits = new Orbits(150, 0.2, 2.5);
orbits1 = new Orbits(400, 0.05, 4);
orbits3 = new Orbits(200, 0.1, 6);
}

void draw() {
//frameRate(1200);
moon.draw();
//moon.stopTurning();
orbits.draw();
orbits1.draw();
orbits3.draw();
}

These are the class tabs:

//class definition of Moon
class Moon{
PVector v1, v2; //attribute of moon
int diameter; //another attribute of moon

Moon(int d){ //this is the constructor 
//does nothing over here
diameter =d; //this is a parameter of the constructor
}

void draw(){
fill(0);
rect(0, 0, width, height);

noFill();
strokeWeight (0.3);
stroke (255, 12); 

for (int i = 0; i < 7000; i++)
{
float angle1 = random (TWO_PI);
float angle2 = random (TWO_PI);
v1 = new PVector (width/2 + cos (angle1) * diameter, height/2 + sin (angle1) * diameter);
v2 = new PVector (width/2 + cos (angle2) * diameter, height/2 + sin (angle2) * diameter);

line (v1.x, v1.y, v2.x, v2.y);
}
//noLoop();
}


} //end of class definition
class Orbits {
float a, x, y, diax, diay;
float d = 23;
int para;
float speed;
float speed4orbit;
float b;

Orbits(int p, float s4o, float s){
para = p;
speed4orbit = s4o;
speed = s;;
}

void draw (){
// earth

pushMatrix();

translate(width/2, height/2);
fill(255);
ellipse(x, y, d, d);

// moon
pushMatrix();
translate(x, y);
rotate(radians(a));
ellipse(0, d, d/3, d/3);
popMatrix();

// orbit line
stroke(255, 100);
smooth();
noFill();

ellipse(0, 0, diax*2, diay*2);


x = sin(radians(-a)*speed)*diax;
y = cos(radians(a)*speed)*diay;
a += 4;

diax = lerp(diax, para, speed4orbit);
diay = lerp (diay, para, speed4orbit);
popMatrix();
}
}


Here is a screenshot of one of the frames.

One thing I am not happy with, and I can’t seem to figure out, is how not smooth the movements are. I tried to change the frameRate but that didn’t work out.

One new thing that learned for this project was PVectors, which I found out how to use through examples.

Casey Reas’ Eyeo2012 Talk – Response

Though sometimes I feel that Reas could have articulated his ideas just as clearly as he did without quoting another artist/influential figure, one line that he did say that I think sums up his talk is, “Artists maintain order in the face of nature”.

Though he doesn’t expand upon what he means by this idea, one of the words I would like to play emphasis on is “maintain”.  Going through many examples of projects, Reas talks about the idea of combating chaos and resolving order; how there is a constant phenomenon of keeping order even if the what is seen seems to be pure chaos. The idea of keeping constant and maintaining a set structure seems to become the basis of design and computing.

I think his point is not only relevant in the case of design and computing, however, it applies to the wider context. One of the main ideas that I got from his talk is the idea that for something to work well, it must have order and a thus a good structure as a base. I felt that his talk was indirectly a life lesson as well.

Overall, I found it interesting how he described the projects that he had made and his explanations of how they linked to the “real world”.